
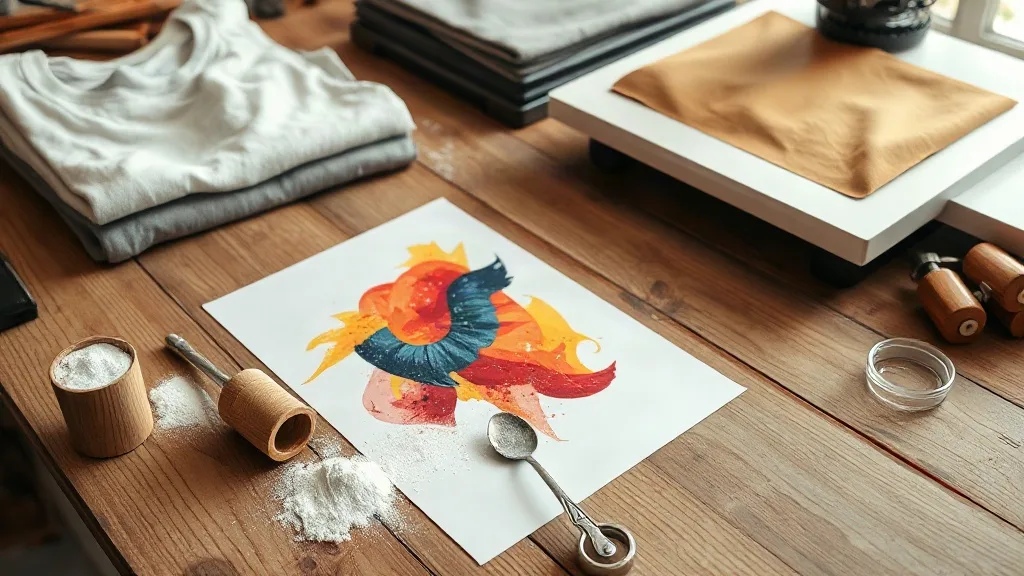
Most people meet dtf transfers for the first time through a quote: a small shop needs twenty shirts by Friday, the screen printer is booked, and someone suggests the film route instead. That moment is where the confusion usually starts, because DTF looks simple from the outside. You print on a sheet, dust it with powder, press it onto fabric, peel, done. The gap between that description and a print that survives fifty washes is where all the real knowledge lives.
This guide is written for the person who is about to buy a starter kit, or who already owns one and keeps getting dull colors or cracked edges. We will walk through what the film and powder are actually doing, why some garments hold a print beautifully and others fight it, and which small habits separate clean results from frustrating ones. No magic settings, no promises that a heat press will fix bad files. Just the mechanics, explained plainly.
What Is Actually Happening Inside a DTF Print
Direct-to-film printing is a transfer process, not a direct-to-garment one. Your design is printed in reverse onto a coated PET film using water-based pigment inks. While the ink is still wet, a thermoplastic adhesive powder is scattered across it. The sheet then goes through a curing step, usually a short bake or a pass under a heat source, which melts the powder into the ink. What you end up with is a flexible sandwich: pigment layer on top, hot-melt adhesive underneath, all sitting on film.
The press does the final job. Heat and pressure melt the adhesive again so it grabs the fibers of the garment, and the film carrier is peeled away once it cools. That peel is the moment of truth. If the powder was under-cured, ink comes off with the film. If the garment was too cold or too damp, the adhesive never bonded properly and you will find out three washes later.
Why the Powder Matters More Than the Printer
People obsess over printer brands and ink sets, but the adhesive powder is where most beginner failures originate. Powder that is too coarse leaves a gritty hand feel and struggles to anchor into tight weaves. Powder applied too thinly gives you crisp edges and terrible wash durability. Too much powder and the print turns stiff and glossy, especially on dark colors.
A useful habit: keep a small notebook and record the powder shake method, the cure time, and the press settings for each job. After a dozen entries you will start to see patterns, like the fact that your humid garage in July needs a longer cure than your dry studio in January. This kind of record keeping is unglamorous, but it is exactly the sort of practical experience that separates a reliable shop from a lucky one.
Choosing Garments That Work With the Process
One of the genuine advantages of dtf is fabric range. Cotton, polyester, blends, canvas totes, even some nylon jackets can take a transfer, which is why the method spread so quickly through small apparel businesses. But "works on" is not the same as "works well on."
- 100% cotton: The easiest starting point. Absorbs adhesive well, prints feel soft, and stretch is rarely an issue.
- Polyester and performance wear: Excellent bond, but watch the press temperature. Polyester can scorch or glaze if you push heat too high, and some dye-heavy fabrics bleed into light-colored prints.
- Cotton/poly blends: Usually reliable, though the hand feel varies depending on the poly ratio.
- Water-repellent or coated fabrics: Often a poor match. The adhesive cannot reach the fibers through the coating.
There is a second consideration that rarely gets mentioned: garment color. Printing on white fabric is forgiving. Printing a light design on a black shirt means laying down a white ink base thick enough to block the background, which adds weight to the print. Expect a slightly firmer hand on dark garments and plan your pricing accordingly, because the material cost is genuinely higher.
Where Prints Actually Fail
When a customer returns a shirt with a peeling corner, the cause is almost always one of four things. Knowing them in advance saves a lot of guesswork.
1. Moisture in the Fabric
Cotton holds ambient humidity. If a shirt has been sitting in a cool storeroom, a quick pre-press for a few seconds drives that moisture out. Skip it and the steam created under the transfer pushes the adhesive away from the fibers. This is the single most common cause of edge lift, and it costs nothing to prevent.
2. Uneven Pressure
A press with a worn platen or a slightly tilted upper arm delivers more force on one side. The print looks fine coming off the film, then the low-pressure corner fails first. Test your press occasionally with a sheet of carbon paper or a pressure-sensitive film to see whether the force is even across the platen.
3. Peeling at the Wrong Temperature
Hot peel and cold peel are not interchangeable. Some films demand that you wait until the sheet is cool, others want it removed while warm. Peeling against the film's instruction either pulls uncured ink or leaves a dull surface. Read the spec sheet for the specific film you bought, not a generic tutorial.
4. Washing Too Soon
Adhesive continues to settle for roughly 24 hours after pressing. A shirt washed the same evening is being tested before the bond has fully matured. Tell customers to wait a day, and wash inside out in cold water. That single instruction prevents a surprising number of complaints.
Designing Files That Transfer Cleanly
File preparation is where designers new to the process lose the most time. A few rules worth internalizing:
- Mirror the artwork. The film is flipped, so an unmirrored file comes out backwards.
- Keep fine hairlines above roughly 0.5 mm. Anything thinner tends to break up during powdering.
- Avoid huge solid blocks of dark ink if you can. They use more material and feel heavier on the shirt.
- Use a transparent background and remove stray pixels around the edges, since every visible pixel becomes printed adhesive.
- Check that small text stays legible at final print size, not just on screen at 400% zoom.
These sound obvious written down, but in a busy week they are exactly the steps that get skipped. A short preflight checklist taped next to the printer earns its space.
Finding a Supplier Without Guesswork
If you are not printing in-house, sourcing is the whole game. Searching for dtf transfers near me usually returns a mix of local print shops, gang-sheet services, and online suppliers who ship nationally. Local pickup saves days on tight deadlines, while mail-order services often handle larger volumes at a lower unit price.
When comparing suppliers, ask specific questions rather than judging by price alone:
- What film brand do they use, and what are its press and peel instructions?
- Do they send a physical sample so you can test on your own garments?
- How do they handle color matching for brand-specific shades?
- What is their turnaround on a reprint if a sheet arrives damaged?
A supplier who answers those clearly is usually a supplier who has done the work. One who dodges them is telling you something too. Order a small test batch before committing to a large run, and press the samples on the exact garment you plan to sell. A transfer that looks perfect on a cotton tee can behave quite differently on a stretchy poly blend.
Making the Prints Last
Durability is mostly about the first three days and the wash routine after that. Press with consistent temperature and full pressure, let the garment rest, and give customers simple care instructions: cold wash, inside out, no fabric softener, tumble dry low or hang dry. Fabric softener is worth calling out specifically, because it coats fibers and gradually weakens the adhesive bond.
For stretchy garments, stretch the print gently while it is still warm after peeling. This relaxes the adhesive layer and reduces the chance of cracking the first time the shirt is pulled over someone's shoulders. It is a ten-second step that noticeably extends the life of prints on performance wear.
Frequently Asked Questions
Can DTF transfers go on dark shirts without a white underbase?
Yes, and that is one of the method's advantages. The printer lays down a white ink layer automatically as part of the print, so you do not need a separate underbase step the way screen printing does. The trade-off is a slightly thicker print on dark fabrics.
How long should a DTF print last after washing?
With correct pressing and cold-water washing inside out, most prints hold up well past thirty to fifty cycles. Results depend heavily on the garment, the powder cure, and how the shirt is washed. Expect shorter life on heavily textured or coated fabrics.
Do I need a commercial heat press, or will an iron work?
An iron can produce a bond, but it is hard to get even pressure and consistent temperature across a large area. For occasional personal projects it is workable. For anything you sell, a proper press with a pressure gauge removes most of the variables that cause returns.
Why does my transfer look dull after peeling?
Usually the film was peeled at the wrong temperature, or the cure was incomplete so some ink stayed behind on the carrier. Check the film's peel instructions and confirm your cure time with a small test sheet before running a full batch.
Is DTF cheaper than screen printing?
For small runs and multi-color designs, often yes, because there are no setup screens and no minimum quantity. For large single-color orders, screen printing usually wins on unit cost. The crossover point depends on your design and volume, so price both for any order above a few dozen pieces.