
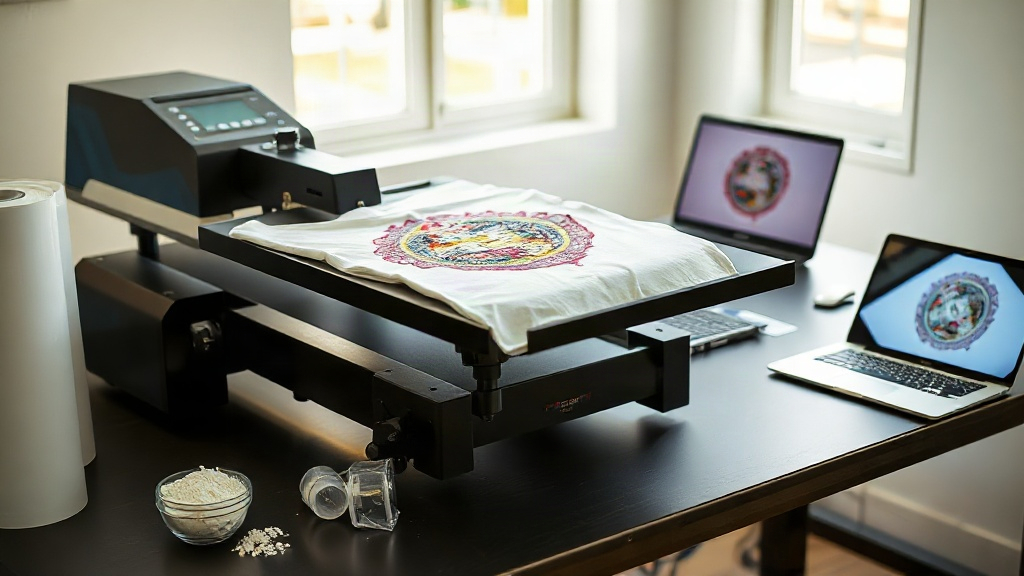
If you've been exploring custom apparel decoration, you've likely encountered DTF printing. It's quickly becoming a favorite for small businesses and hobbyists alike because it offers vibrant colors, works on almost any fabric, and doesn't require weeding. But what exactly is DTF, and how can you use it to produce stunning transfers? In this guide, I'll walk you through the entire process, from understanding the technology to troubleshooting common issues. Whether you're a complete beginner or looking to expand your printing skills, this article will give you the practical knowledge to get started with confidence.
What Is DTF Printing?
DTF stands for Direct to Film. It's a printing method where your design is printed onto a special film, coated with a powder adhesive, and then heat-pressed onto the fabric. Unlike DTG (Direct to Garment) or screen printing, DTF doesn't require pre-treatment or specialized inks for different materials. The process works by printing a mirror-image design onto a PET film using water-based pigments, then applying a thermoplastic polyurethane (TPU) powder while the ink is still wet. After curing the powder, you have a ready-to-use transfer that can be stored and applied later.
The magic of DTF lies in its versatility. It adheres to cotton, polyester, blends, nylon, leather, and even some treated plastics. That means you can decorate t-shirts, hoodies, tote bags, caps, and more with a single method. Plus, the prints stretch with the fabric without cracking, making them ideal for performance wear and athletic gear.
Why Choose DTF Over Other Printing Methods?
When you compare DTF to other decoration techniques, several advantages stand out:
- No weeding required: Unlike vinyl, you don't have to cut and peel away excess material. This saves hours on intricate designs.
- Works on dark and light fabrics: With a white ink base, DTF transfers show up vividly on black, navy, or any dark color.
- Full-color capability: You can print gradients, photographs, and fine details without color limitations.
- Durability: When applied correctly, DTF prints withstand dozens of washes without fading or peeling.
- Low startup cost: You don't need screens, platens, or a dedicated room. A decent printer, film, powder, and a heat press are enough.
Of course, there are trade-offs. DTF transfers have a slightly thicker feel than DTG on light garments, and the process requires careful temperature control. But for most users, the benefits far outweigh the drawbacks.
Materials and Equipment You'll Need
Before you dive into DTF printing, gather these essentials:
- Printer: A modified inkjet printer with DTF ink (CMYK plus white). Epson models are popular for conversion.
- DTF film: PET film sheets or rolls, typically 75-100 microns thick. Available in cold-peel or hot-peel variants.
- DTF powder: TPU adhesive powder, usually 80-200 microns. Finer powder works better for detailed designs.
- Heat press: A reliable press with accurate temperature and pressure control. A clamshell or swing-away model works well.
- Curing oven or heat gun: To melt the powder evenly. Some use a dedicated powder curing oven, but a heat gun can work for small batches.
- Protective gear: Gloves, mask, and ventilation when handling powder.
You'll also need design software like Photoshop, Illustrator, or free alternatives such as GIMP or Inkscape. Remember to mirror your design before printing.
Step-by-Step DTF Printing Process
Here's how to create a DTF transfer from start to finish:
- Prepare your artwork: Create your design in CMYK mode, mirror it horizontally, and ensure the resolution is at least 300 DPI. Save it as a TIFF or PNG with a transparent background if needed.
- Print onto film: Load the DTF film into your printer. Print the design. The printer will lay down white ink first (if your design has white areas or you're using a dark garment), followed by color inks.
- Apply powder: While the ink is still wet, sprinkle TPU powder evenly over the printed area. Shake off excess powder gently. You can use a powder shaker for better control.
- Cure the powder: Place the film in a curing oven at around 160°C (320°F) for 2-3 minutes, or use a heat gun until the powder melts and becomes glossy. Avoid overheating, which can warp the film.
- Press onto fabric: Preheat your heat press to 160-170°C (320-340°F). Place the transfer on the garment with the powder side down. Press for 15-20 seconds with medium pressure.
- Peel and finish: Wait for the transfer to cool completely (cold peel) or peel while hot (hot peel), depending on your film type. For extra durability, press again for 5 seconds with a protective sheet.
That's it! You've just created a professional-quality DTF transfer.
Common DTF Problems and How to Fix Them
Even with practice, you might run into issues. Here are solutions to frequent DTF challenges:
1. Cracking or peeling after washing
This usually means the powder wasn't fully cured or the pressing temperature was too low. Increase curing time or temperature slightly. Also, ensure you're using enough pressure during the transfer.
2. Faded or dull colors
Check your printer settings. You might need to increase ink density or use a higher-quality DTF ink. Also, make sure the white ink layer is sufficient for dark garments.
3. Powder not sticking
If the powder doesn't adhere to the ink, the ink may have dried too much before powdering. Work quickly, or adjust your printer's ink saturation. High humidity can also affect adhesion.
4. Film curling or melting
Lower the curing temperature or shorten the time. Not all films are created equal; try a different brand if problems persist.
Tips for Better DTF Results
After countless hours of DTF printing, I've picked up a few tricks that make a big difference:
- Control your environment: Dust and humidity are enemies. Keep your workspace clean and aim for 40-60% humidity.
- Test your powder: Different powders have different melt points. Experiment to find what works best with your ink and film.
- Use a heat press, not an iron: Irons don't provide even pressure or consistent temperature. A heat press is worth the investment.
- Store transfers properly: Keep them in a cool, dry place away from direct sunlight. They can last for months if stored correctly.
- Practice with small designs: Before tackling a large, detailed print, run a few test pieces to dial in your settings.
Frequently Asked Questions About DTF Printing
Can I use DTF on 100% polyester?
Yes, DTF works beautifully on polyester. In fact, it's one of the few methods that adhere well to synthetic fabrics without dye migration issues. Just use a lower pressing temperature (around 150°C) to avoid scorching.
How long do DTF transfers last?
With proper application and care, DTF prints can last 50+ washes. Turn the garment inside out, wash in cold water, and avoid harsh detergents or bleach. Tumble dry low or hang dry.
Do I need a special printer for DTF?
You can convert a standard inkjet printer (like an Epson EcoTank) to use DTF inks. However, dedicated DTF printers are available and offer better reliability and white ink circulation. If you're serious about production, consider a purpose-built model.
What's the difference between DTF and DTG?
DTF transfers are printed on film and then applied, while DTG prints directly onto the garment. DTG is great for cotton, but DTF is more versatile across fabrics and doesn't require pre-treatment. DTF also allows you to stock transfers for on-demand pressing.
Can I layer DTF transfers?
Absolutely. You can apply multiple transfers for a multi-color or multi-layer effect. Just press each layer separately, and use a protective sheet to avoid scorching.
Final Thoughts
DTF printing opens up a world of possibilities for custom apparel. It's accessible, cost-effective, and produces stunning results on nearly any fabric. By following the steps outlined here and practicing regularly, you'll be creating professional-grade transfers in no time. Remember, the key is in the details: precise temperature, consistent pressure, and quality materials. So gather your supplies, fire up your printer, and start experimenting. Your customers (or your own wardrobe) will love the vibrant, durable designs you create.